Continuous Unit Checking:
Part Three

Where were we?
- Part 1: Command-line utilities and wrapper scripts
- Part 2: Guard (with Ruby) and SBT (with Scala)
- Part 3 (this): Infinitest (with Java and IntelliJ IDEA)
In Part 1, we looked at some simple continuous checking solutions based on shell commands and wrapper scripts. In Part 2, we climbed up the pile of tools a bit and tried out guard (Ruby) and sbt (Scala). Now we’ll have a look at Infinitest for Java, with JetBrains IntelliJ IDEA.
Infinitest was one of two continuous checking tools for Java that came out in the early 2000s; the other was Kent Beck’s JUnitMax. Both products were initially offered on a paid basis, but the market was not ready to pay for continuous checking at the time. JUnitMax was withdrawn, and Infinitest converted to a “free” distribution model.
Integrated Development Environments
Some developers prefer a command-line-centric development work flow, while others prefer an integrated development environment (IDE) that presents a suite of development tools within a single application window. IDEs always include a text editor; usually one that has some language-aware features such as syntax highlighting, autocompletion, and (possibly) intellisense. Another handy feature of modern editors (both standalone and embedded in IDEs) is the ability to define snippets of code for boilerplate functionality and drop them into your application in a more-or-less intelligent way.
In most cases, support for one or more unit testing frameworks is either bundled with the IDE or is available as a plugin. IDEs often include a debugger and a profiler, as well. Assisted refactoring is another feature that has become a basic expectation in any high-end IDE.
Finally, most IDEs provide some way to execute external tools and manage them without leaving the IDE; these can include things like version control systems, diff utilities, servers, Web browsers, wireless device emulators, dependency managers, and build utilities.
One of the advantages of an IDE is that the product connects the various tools so that you can navigate easily from, say, a failed unit test case directly to the text editor at the offending line of code, or from a particular line of code directly into the debugger at that point. Working with independent tools on the command line you don’t get that level of integration.
It will be a good day when support for continuous unit checking becomes an expected baseline capability of IDEs. Until then, Java developers enjoy an advantage over others in that Infinitest is available.
Installing Infinitest in IntelliJ IDEA
Infinitest was originally written as an IntelliJ IDEA plugin, and was later ported to Eclipse. As of today I’m not sure how the Infinitest team handles development, but it seems as if IntelliJ IDEA still gets preference. To get the latest functionality and (probably) the best support, I suggest using Infinitest with IntelliJ IDEA.
To install Infinitest, open the Preferences or Settings dialog in IntelliJ IDEA. You can do this with a keyboard shortcut (by default it’s “⌘,” on OSX and “Ctrl+Alt+S” on Windows or Linux) or by opening Preferences from the main menu bar (under “IntelliJ IDEA => Preferences” on OSX and under “File => Settings” on Windows and Linux).
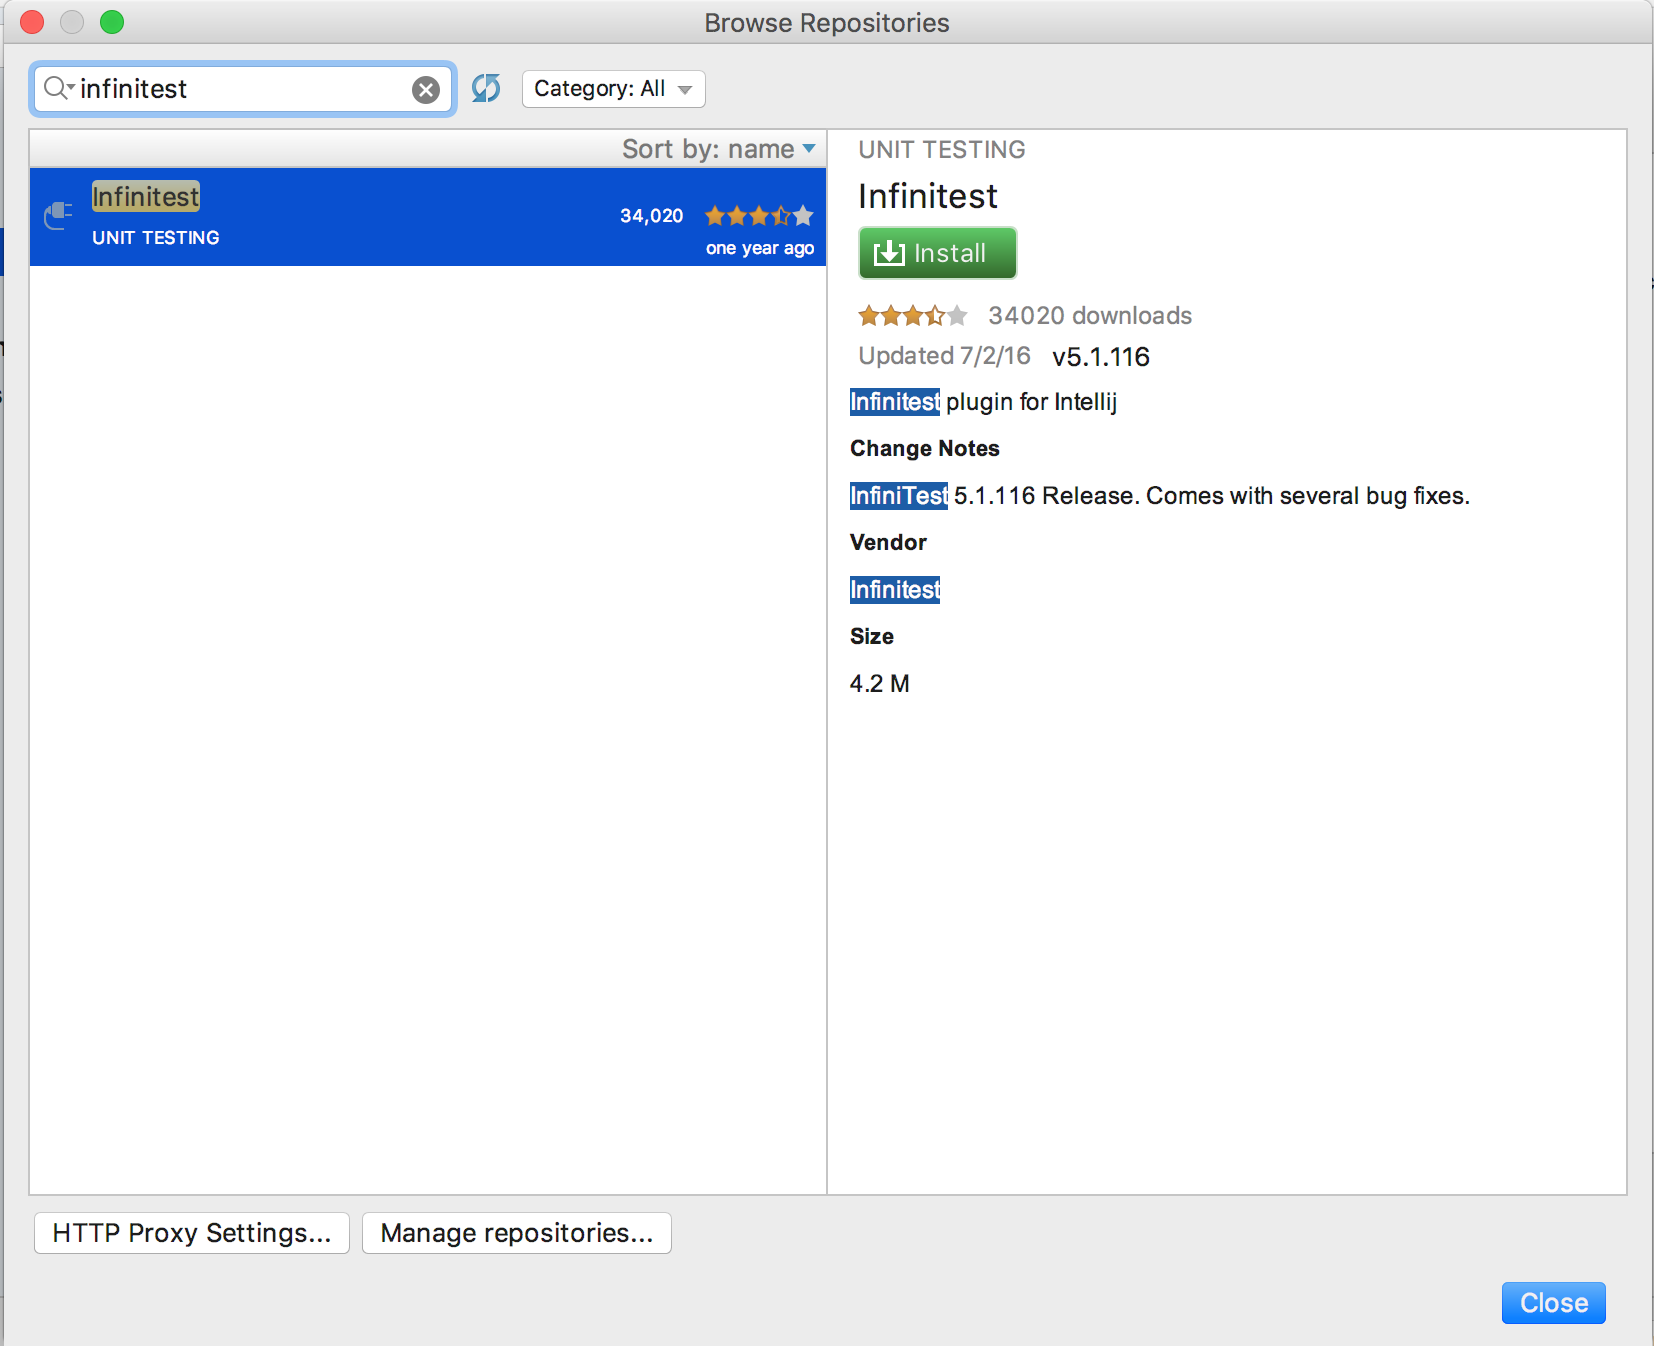
In the Preferences or Settings dialog, choose the Plugins tab (a selection on the left-hand side of the panel). In the search box near the top of the panel, type “infinitest”. If Infinitest is not already installed, IntelliJ will invite you to install it. Click the “Install” button to proceed.
After downloading the necessary components, IntelliJ will notify you to restart it.
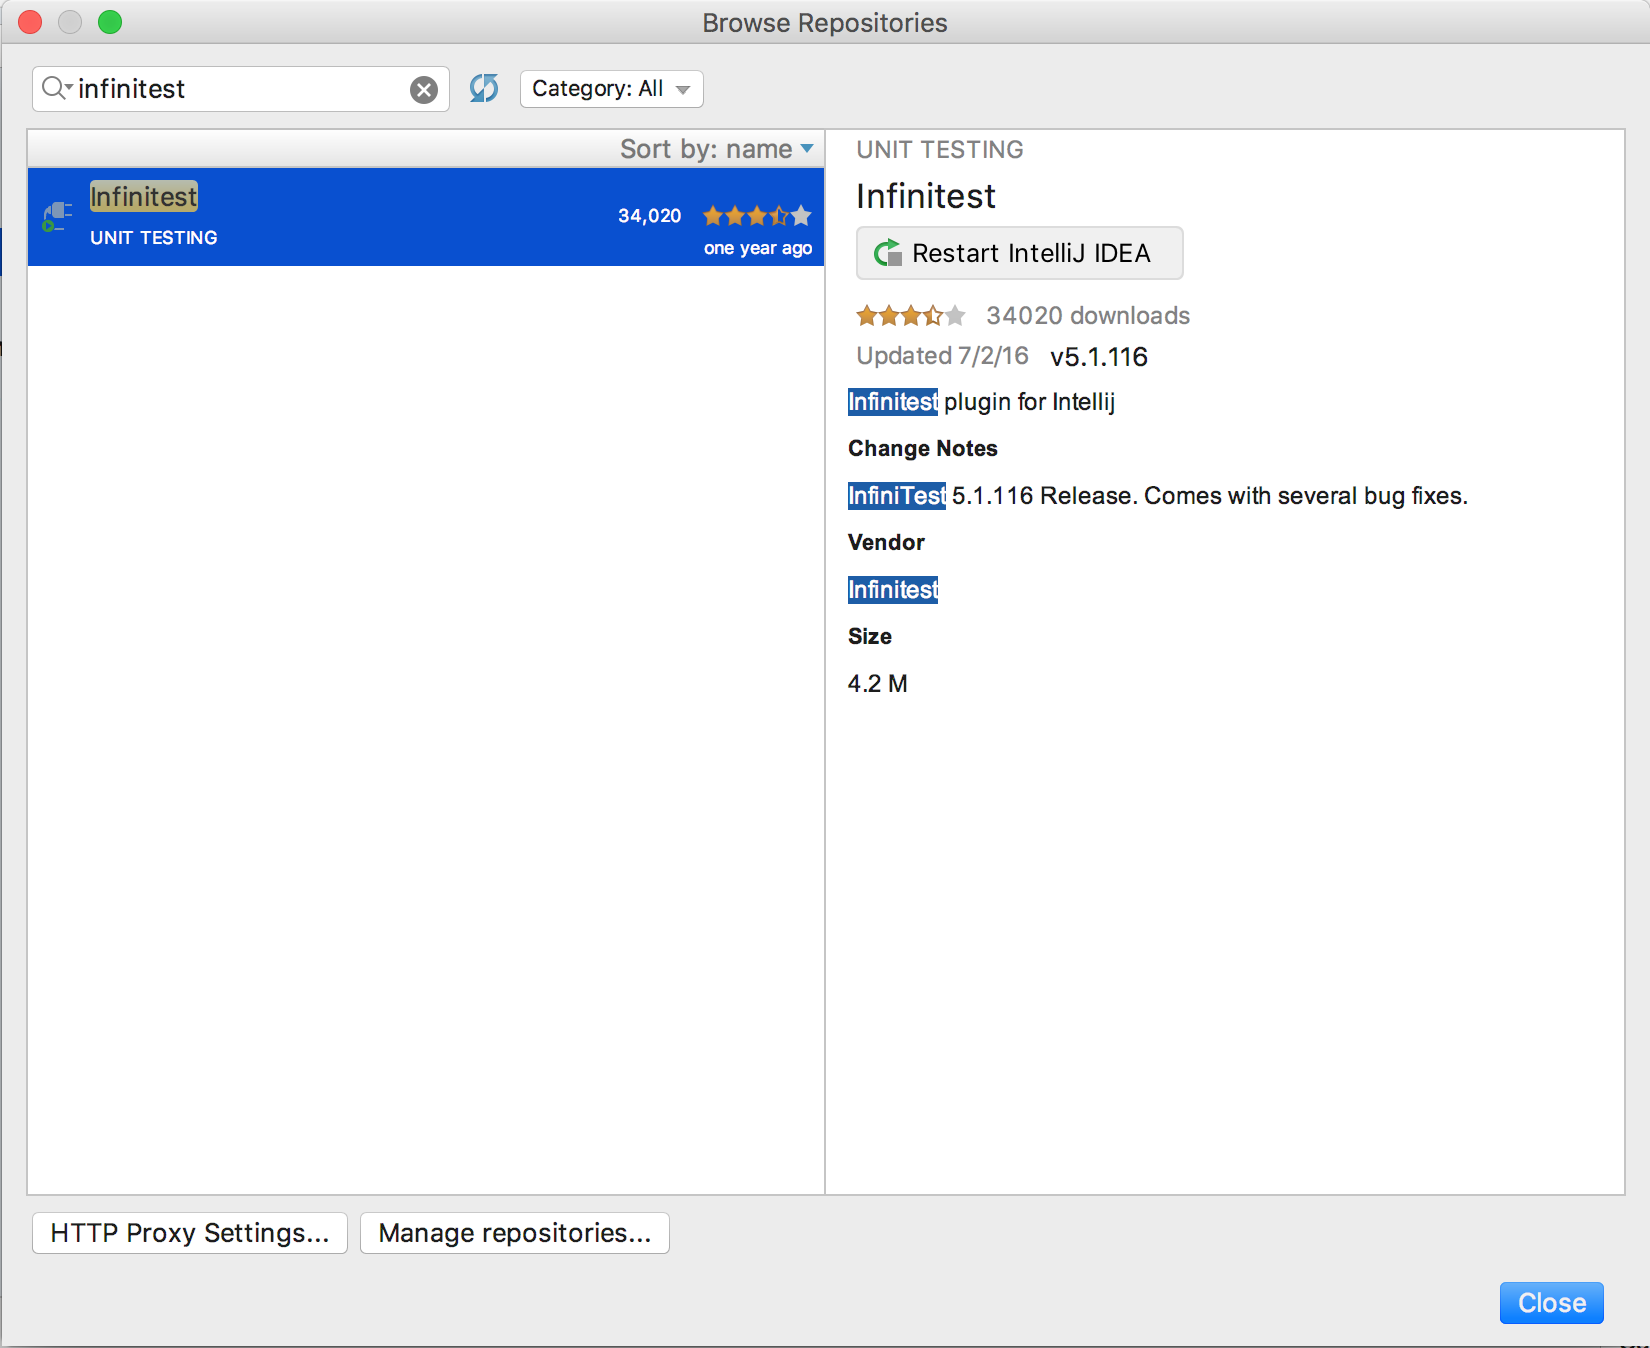
Infinitest is installed. To make use of it in a project, you have to enable the Infinitest facet on that project. First, let’s create a trivial project.
Incrementer Project
To exercise Infinitest, I created a trivial project called incrementer along the same lines as the Python, Ruby, and Scala projects we defined in Parts 1 and 2 of this series. Here’s the “application” code:
public class Incrementer {

    public int increment(int number) {
        return number + 1;
    }
}
and here’s the “unit test suite”:
import org.junit.Test;

import static org.junit.Assert.assertEquals;

public class IncrementerTest {

    @Test
    public void increment_returns_3_when_original_value_is_2() {
        assertEquals(3, new Incrementer().increment(2));
    }
}
Enabling Infinitest
Infinitest is installed, but it doesn’t “just work.” To make use of it in a project, you have to enable the Infinitest facet on that project. (Remember that as we climb the pile of tools, configuration becomes more tedious. That’s the price of admission for additional functionality.)
Open the project settings for incrementer. On OSX, you can use keyboard shortcut “⌘;” or menu option “File => Project Structure”. On Windows or Linux, use keyboard shortcut “Ctrl+Alt+Shift+S” or menu option “File => Project Structure”.
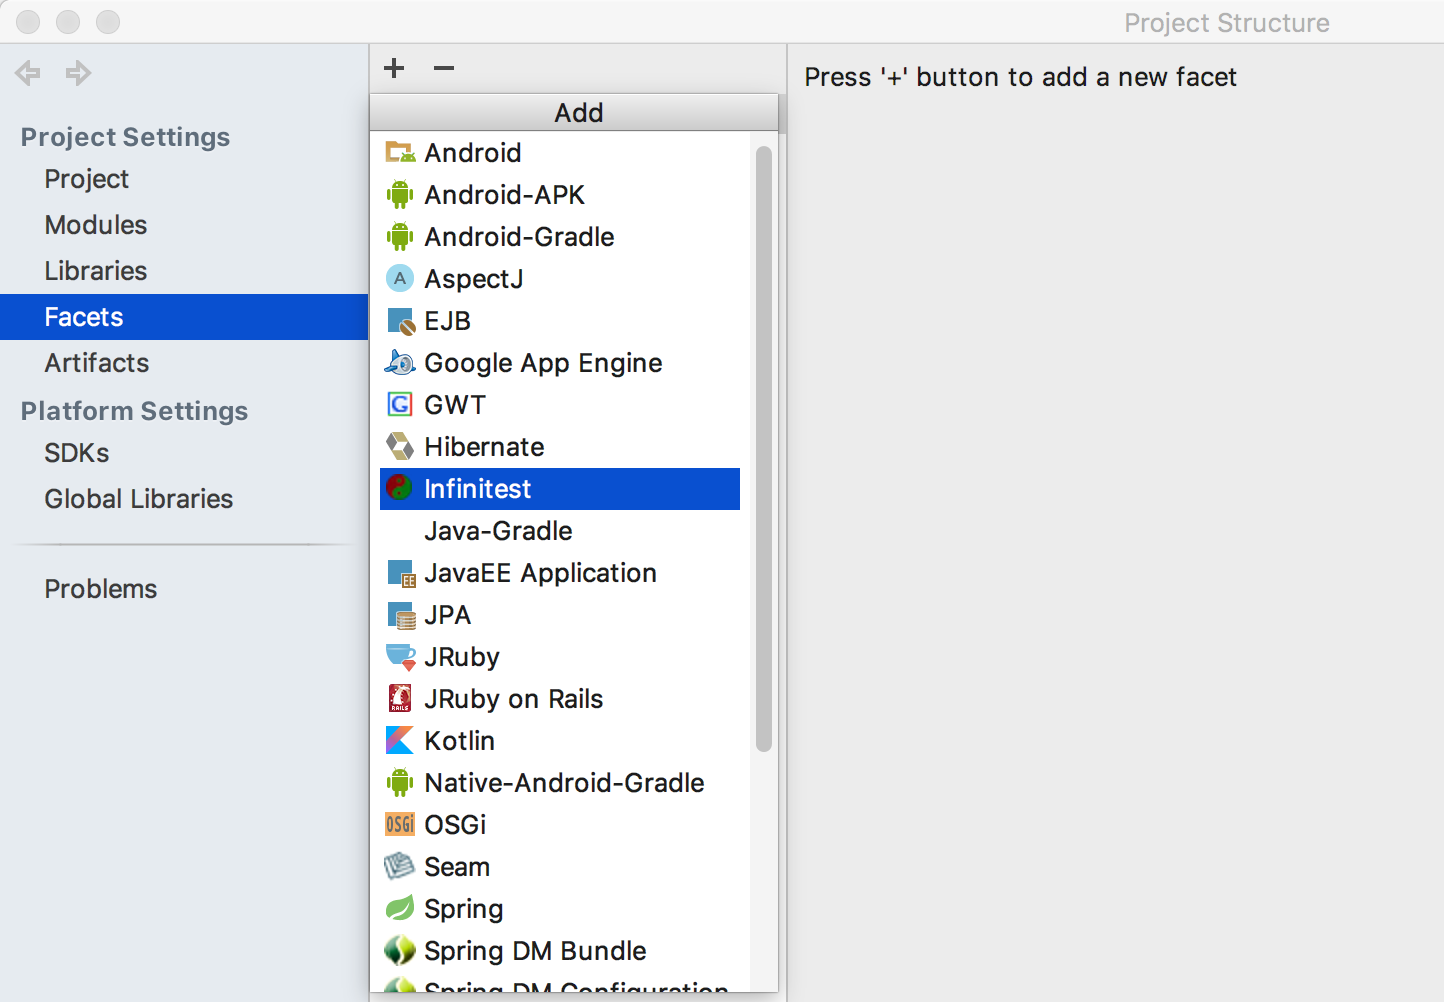
Choose “Facets” (an option on the left-hand side of the panel). Click the plus sign (+) to add a facet. Scroll down to Infinitest. That gets you to this point:
The “Choose Module” pop-up appears.
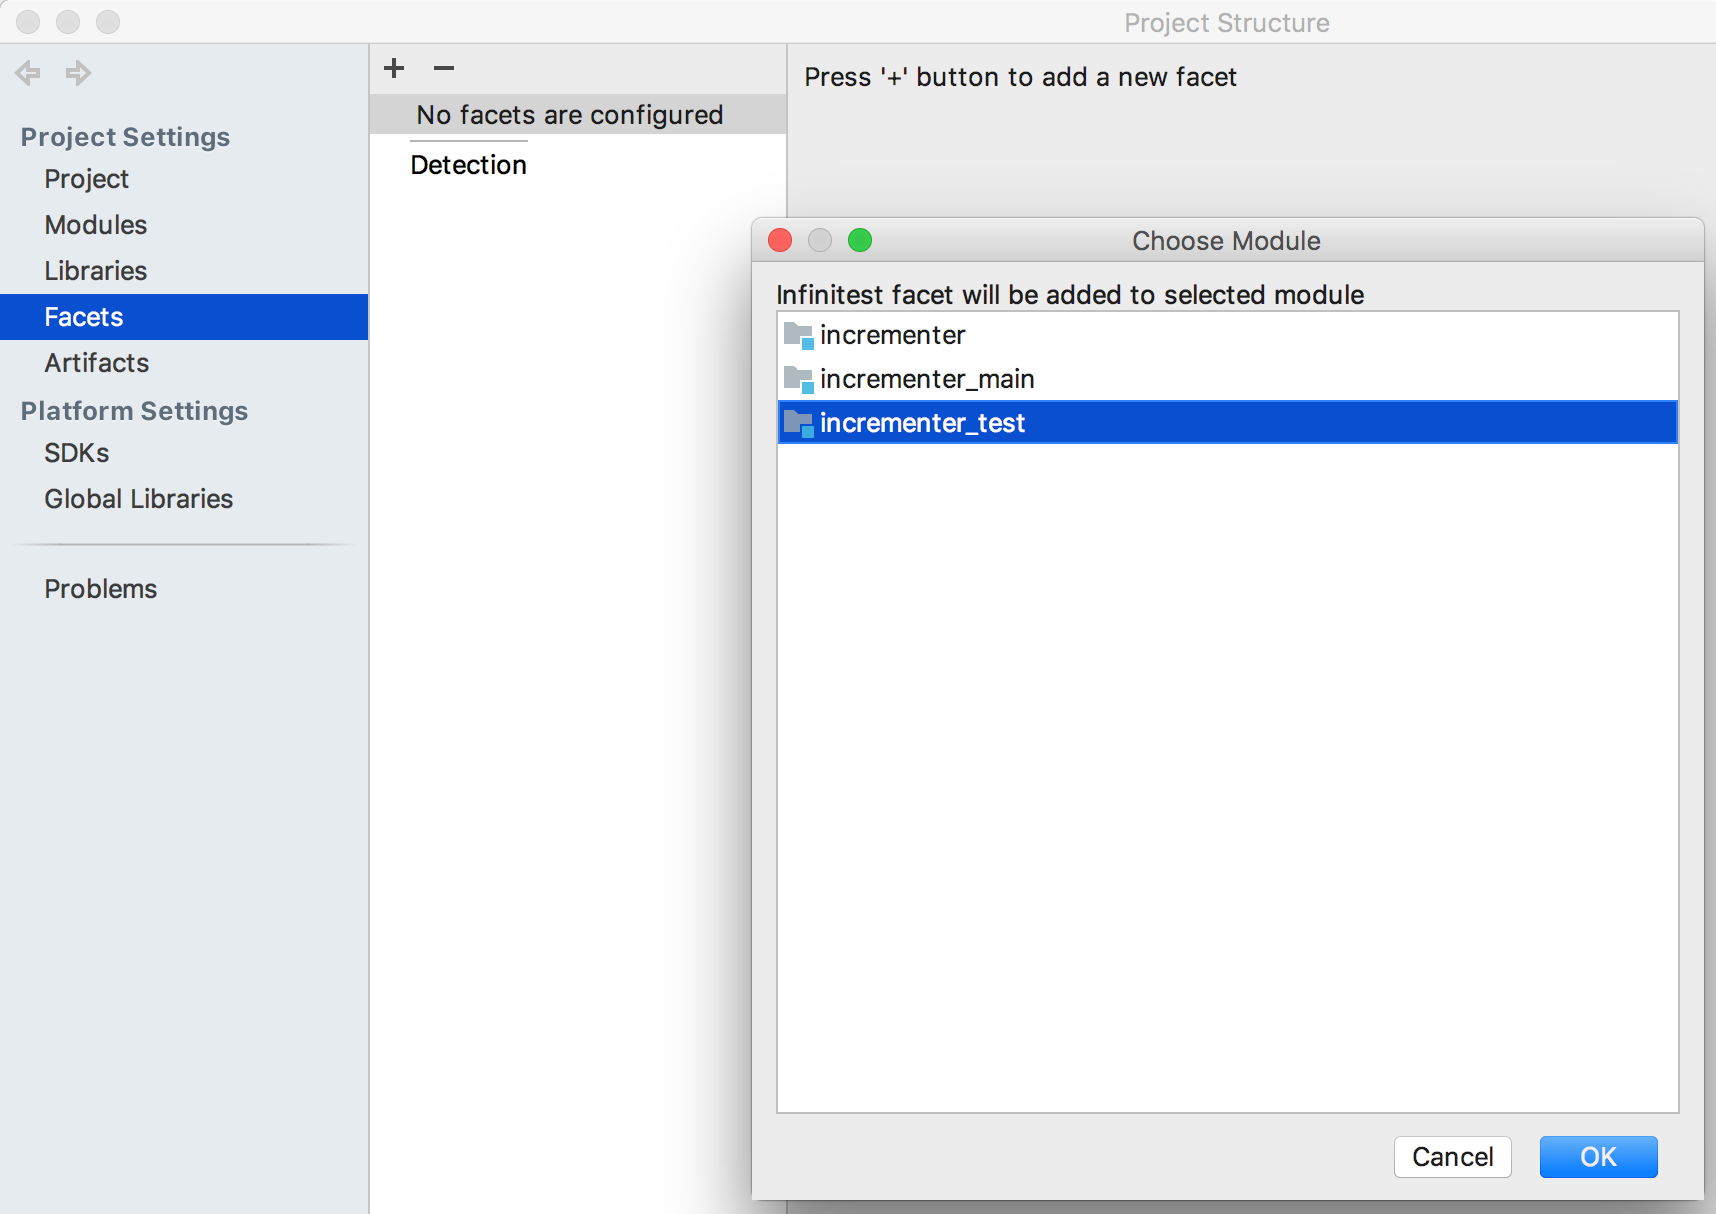
Choose “incrementer_test”.
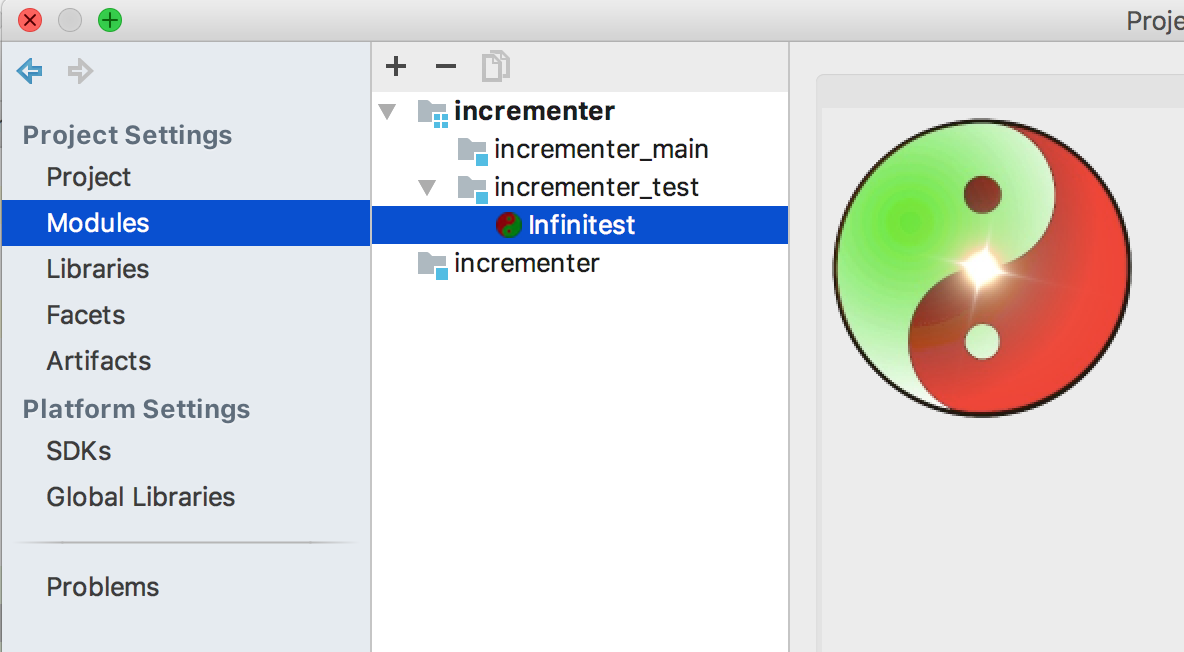
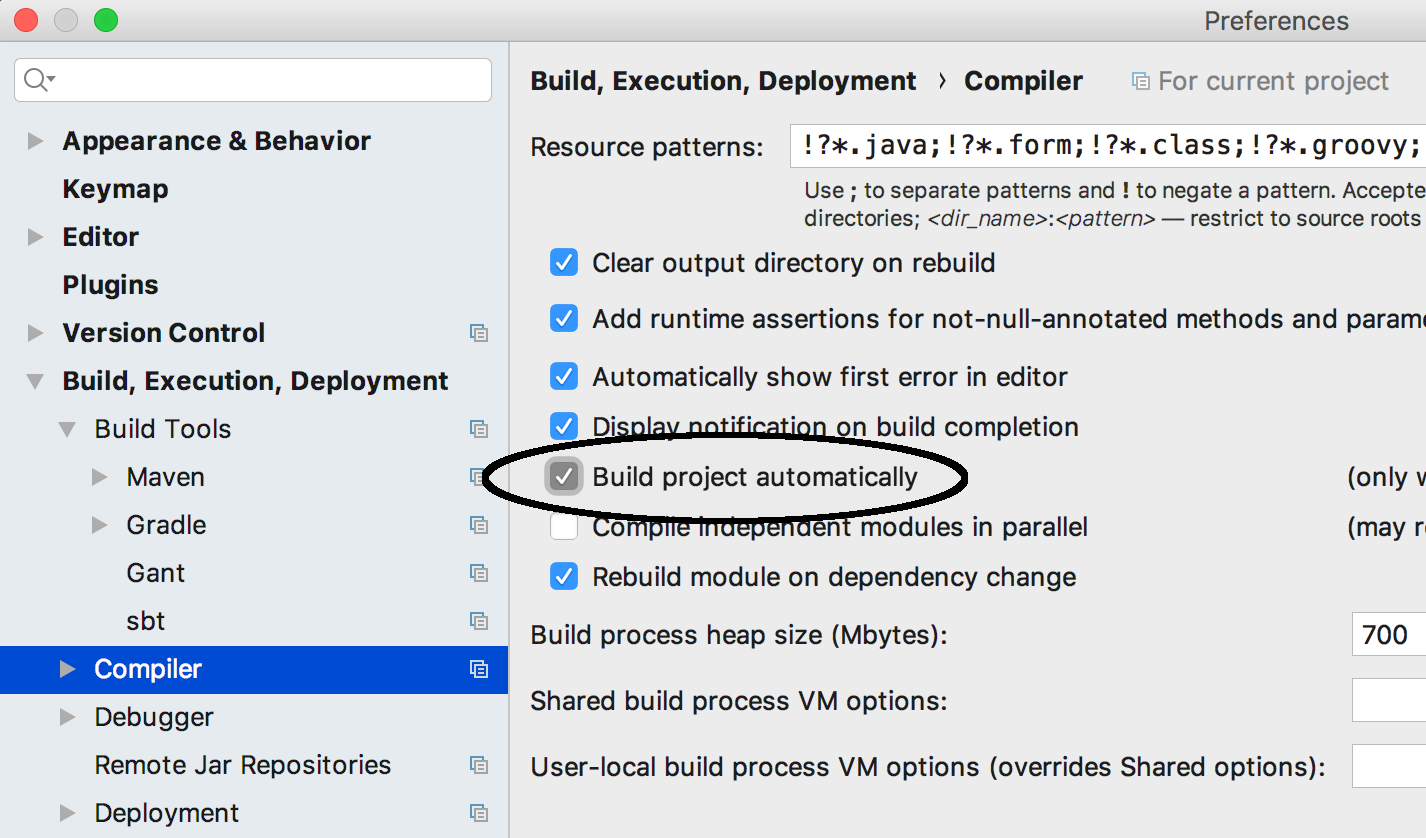
Now Infinitest is enabled for the incrementer_test module of project incrementer. But it still won’t work. You have to set the “Make project automatically” option.
Just for fun, the documentation around this is extremely confusing. You’ll see a reference to “project settings,” but what is meant is “IDE settings” or “preferences.” The setting you’re looking for is not at the project level. Open the Preferences or Settings dialog as you did before.
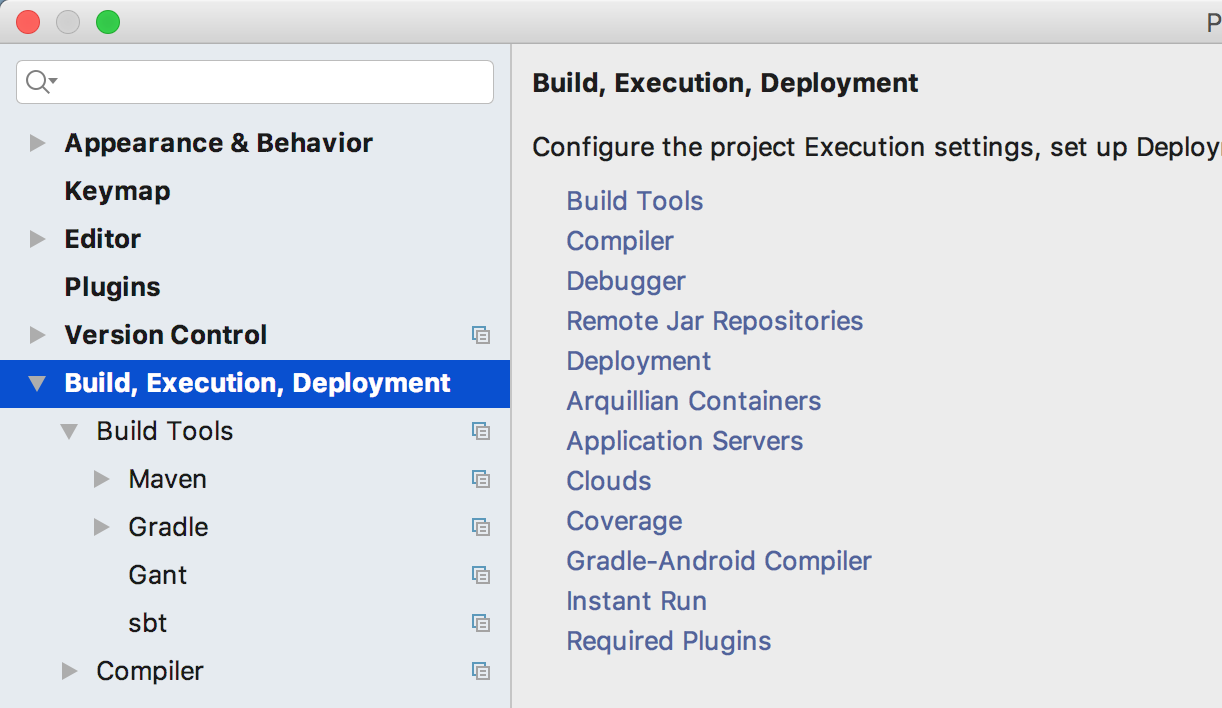
Now choose “Compiler”. You can choose the entry on the left-hand side or the one on the right-hand side. They lead to the same place:
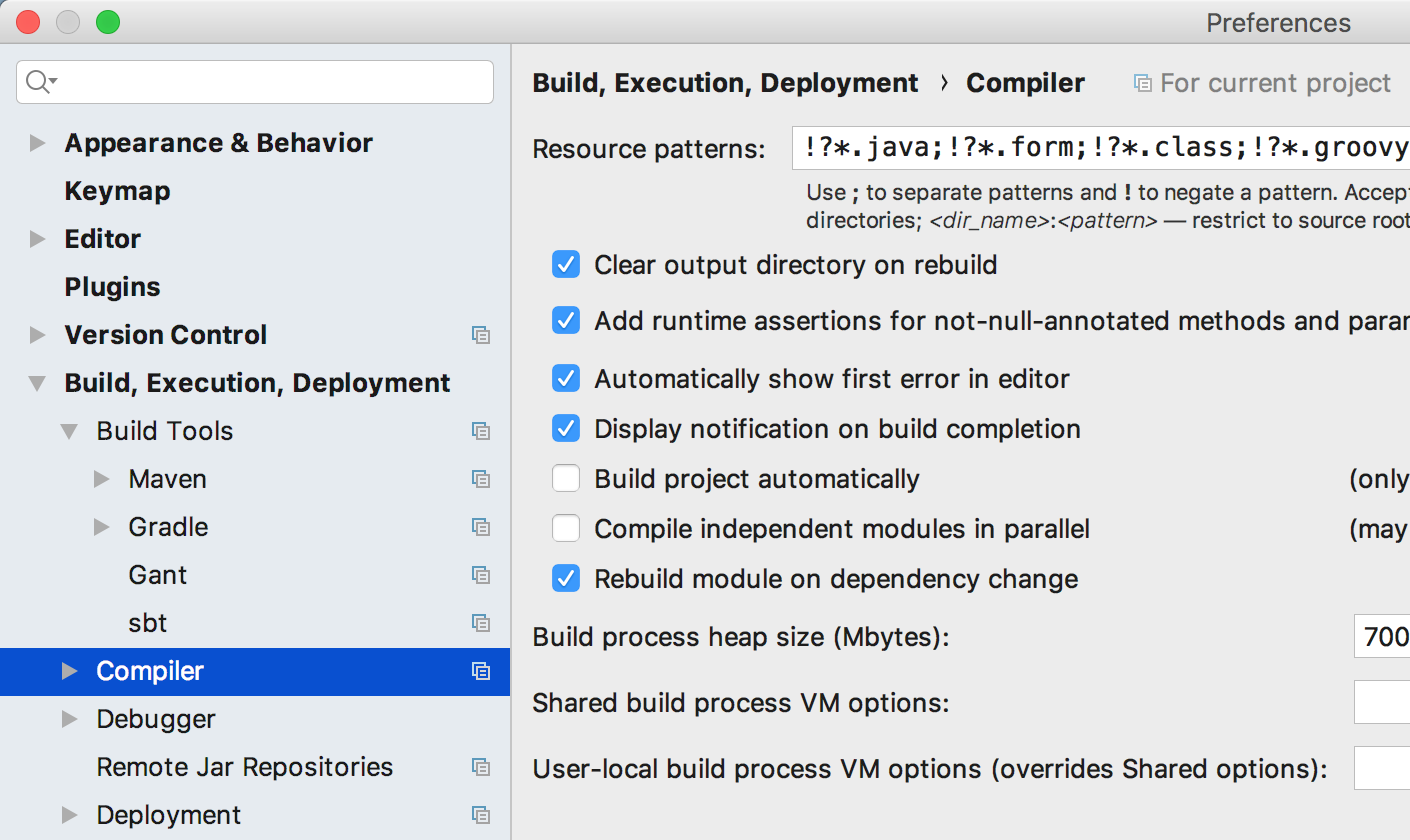
Look for the checkbox labeled “Build project automatically” and select it:
To see the test results, you have select “View => Tool Windows => modulename” from the main menu.
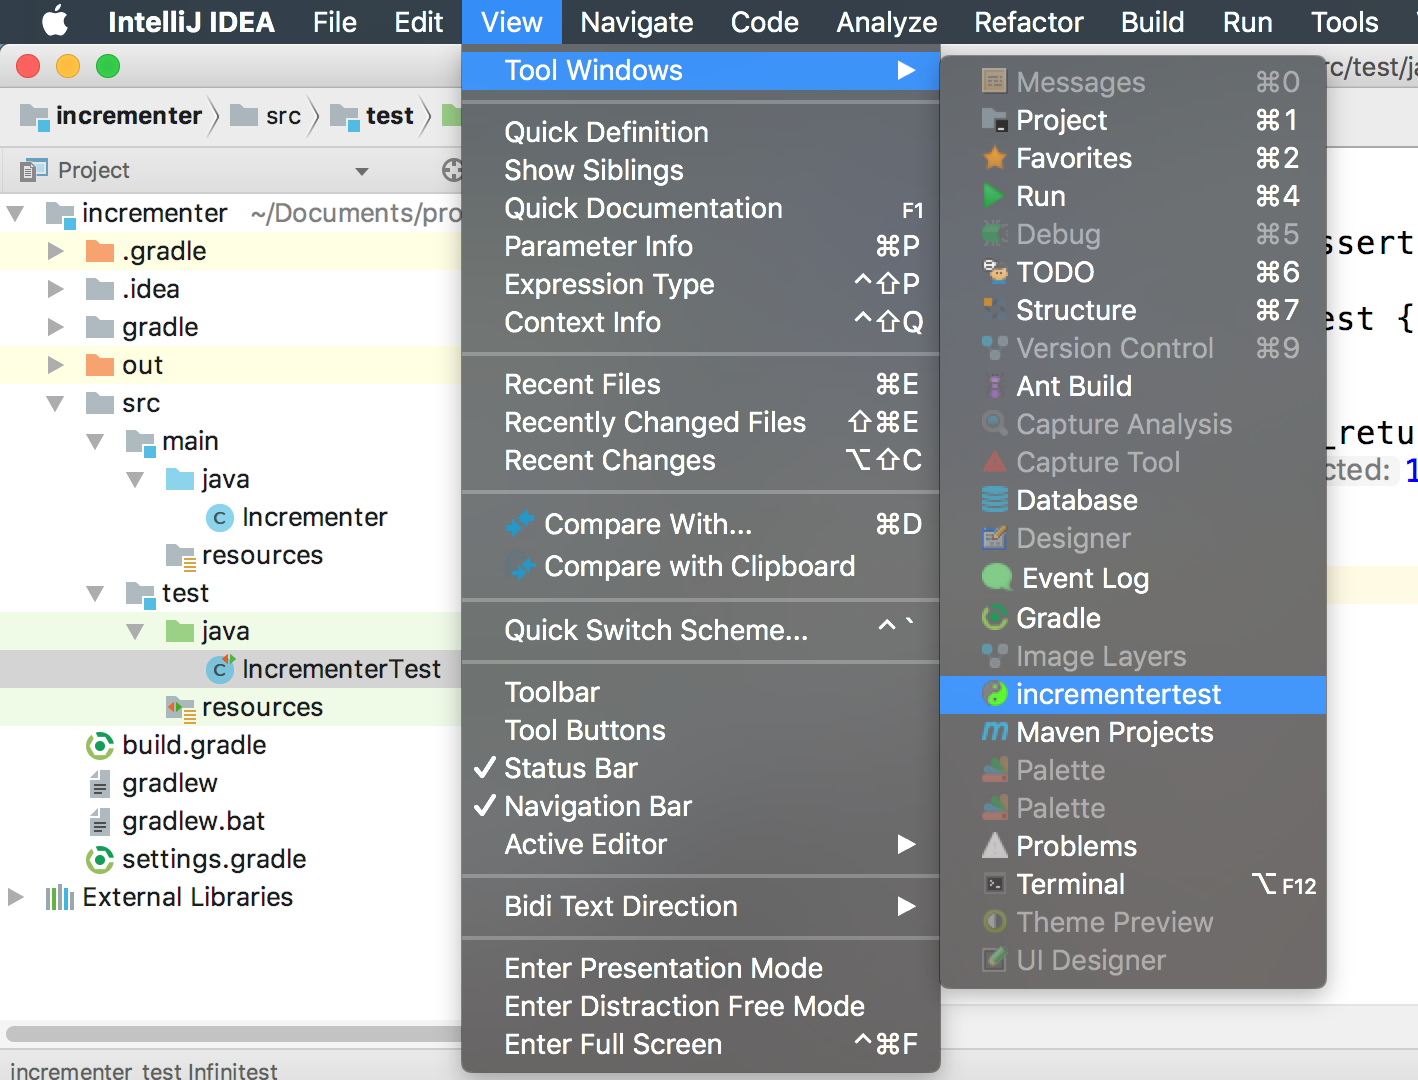
At this point, Infinitest will watch for changes in the module and run the relevant unit checks whenever a change is detected. It detects changes when a file is saved. Note that IntelliJ saves periodically in the background, so Infinitest may report test results even if you haven’t explicitly saved.
Here’s a short demo:
Conclusion
In this series of posts we’ve taken a brief look at several options for continuous unit checking. The main take-away is that having our tooling take care of running our unit checks in the background frees us to maintain our “foreground” minds in a state of flow to solve the problem we’re trying to solve.
There aren’t as many tools available to support this as there are for other aspects of development, but we do have several alternatives. They span a range from simple-but-crude to feature-rich-and-complicated.
Both the typical preferences for development work flow are accommodated: Separate tools running in their own terminals (for any language), or integrated tools bundled within an IDE (for Java and other JVM languages, anyway).
